
[PHP] How to Using CodeIgniter
CodeIgniter 是一個簡單易學並且開放的 PHP 框架,他透過簡潔的方式來打造屬於你的網站,然而已經許久都沒有更新的 CI(2012 年更新),前年大動作更新到 3.0 版本,然而這次的更新也修改了不少的錯誤,並且增加了許多有趣的 Libraries,有機會再向大家介紹,這次我們會以 3.0 為主軸來介紹開發。
Download Codeigniter
 Codeigniter TW
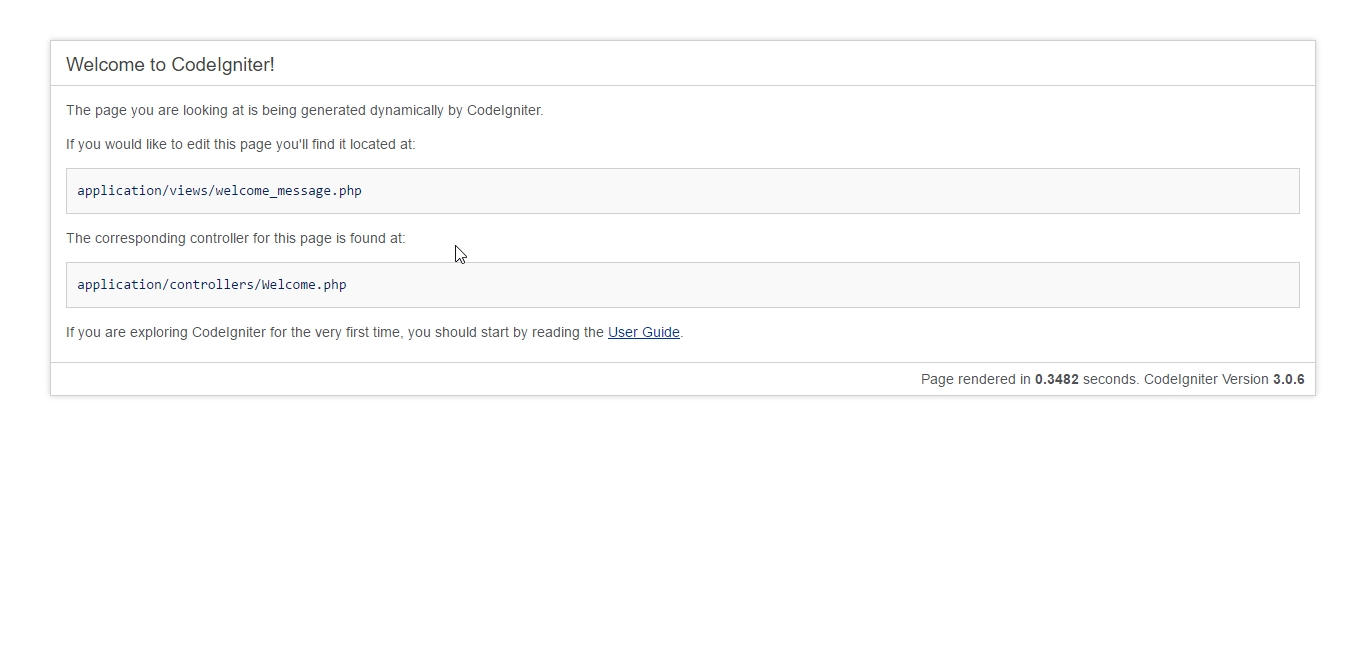
首先我們先下載 Codeigniter 3.0.6 ,完成後把裡面資料解壓縮到你指定的資料夾(以 C:\Project\USee 為例子)。接下來你看到的結構大致上會是這樣:
1 | USee |
接著我們啟動 Server,輸入 localhost 就完成了!可喜可樂!
Build the clean web page.
對於 CI 有四大重點部分
- Controllers 主要負責網頁邏輯部分
- Models 主要負責與資料庫溝通
- Views 畫面的顯示
- Router 網址的路由
觀念以下,首先我們會到瀏覽器,輸入網址(Router),之後 Router 會針對使用者所輸入的網址進入不同的 Controller(預設是 Welcome),如果沒有指定路徑會自動進入 index,接下來可能會跟 Model 去要資料庫的資料最後在顯示到 View 上面,接下來我們開始實作一個頁面。
.htaccess
在開始之前我們先在主目錄建立一個.htaccess讓 CI 了解目前的路徑。
1 | RewriteEngine on |
但還有一點,目前我 Apache2 的根目錄並不是C:Project/USee,而是C:Project,所以 USee 算是我們的子目錄,所以我們要跟 CI 說要使用的位置在 USee,所以我在修改一下.htaccess。
1 | RewriteEngine on |
完成後我們重新啟動 Server 就能啟動。
Controllers
接下來我們就開始打造一個頁面吧!首先我們打開 Router 設定該路徑:
1 | $route['hello'] = 'welcome/hello'; |
在上面你會看到當使用者輸入hello的時候,會自動導引到 controller 資料夾下 welcome 裡的 hello 函式。接下來我們先打開預設的 Controller Welcome.php 下建立一個函式:
※新增 Controller 時,記得檔名字首大寫。
1 | function hellow() {} |
Views
緊接著我們在 Views 內建立一個網頁:
1 |
|
Controllers
我們在回到 Controller,讓路徑導入到畫面:
1 | function welcome() { |
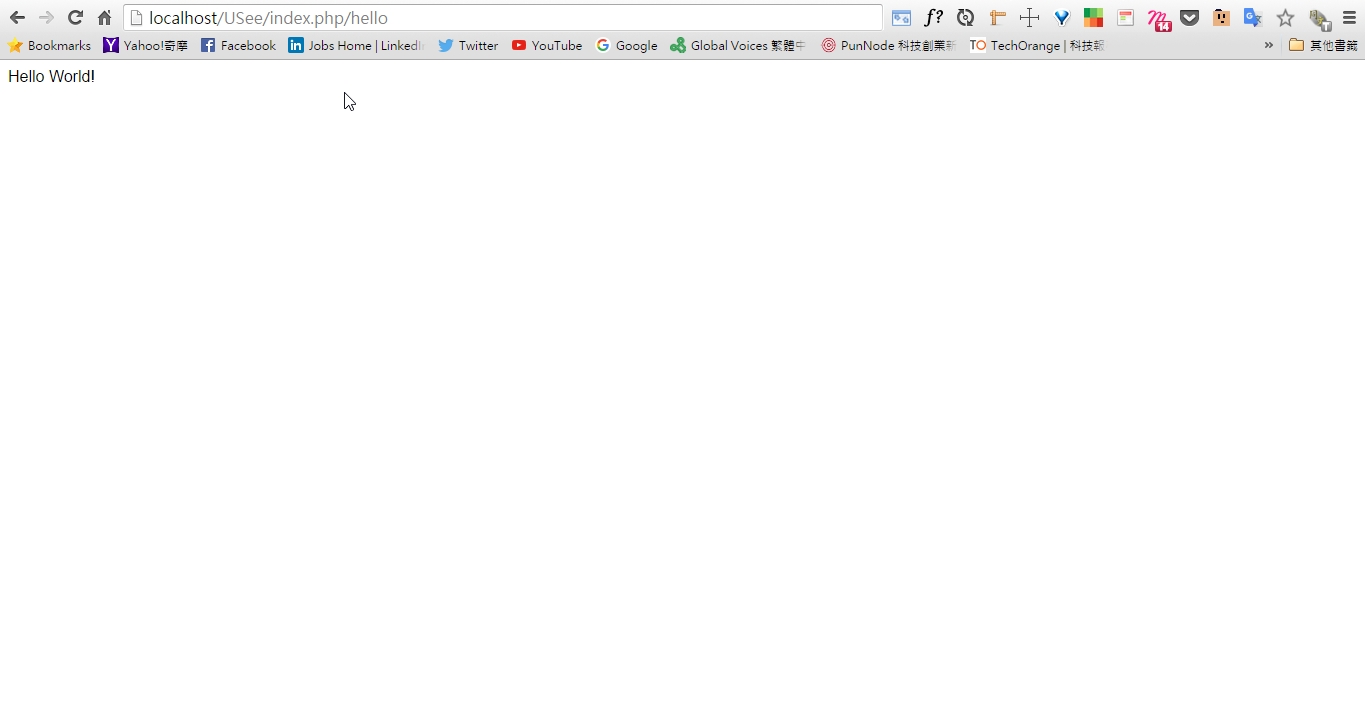
接著我們輸入網址,http://localhost/[你資料夾的名字]/hello,但是畫面出來卻是 error 404,原來是我們少了index.php,我們輸入http://localhost/[你資料夾的名字]/index.php/hello,這樣我們就能看到畫面了!
I don’t like index.php on path.
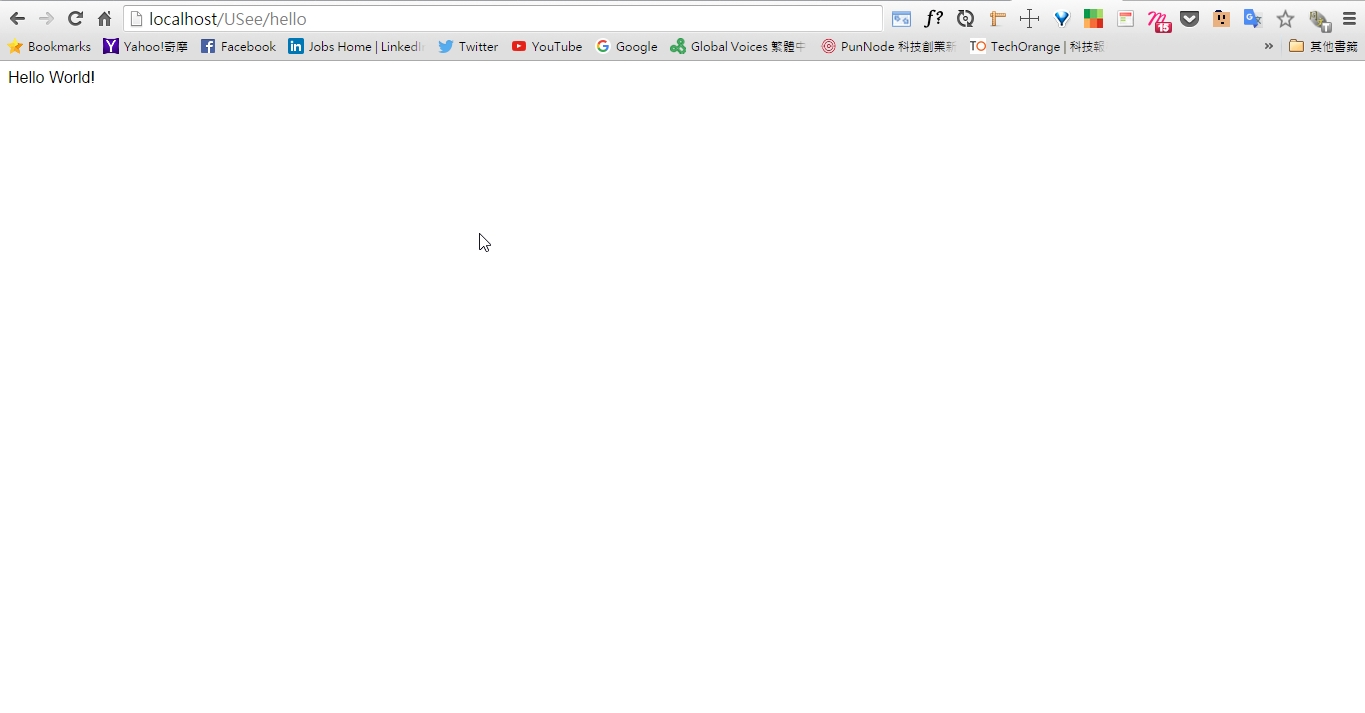
接下來我們修改一些設定,在 CI 預設中到任何網頁中前方都要加個 index.php , 有點像剛剛的畫面 http://localhost/USee/index.php/hello 該怎麼把他刪除呢?首先我們進入 application/config 資料夾有個 config.php 。我們進行以下修改:
1 | $config['index_page'] = ''; |
接著我們重新啟動就能解決這個問題了~萬歲!
※接下來是我的小習慣,我通常都會到config/autoload.php設定一些小撇步,通常比較常用到的功能自動載入,例如 URL 網址跟檔案相關的設定,參考設定如下:
1 |
|
這樣大致上就完成拉!