
Server - How to Create Server on Google Cloud Platform
大家好,我是 David,今天我要來講如何在 Google 的平台上架設一台 Linux 虛擬主機,接著再套用到我們上次安裝的 Codeigniter。
Get Ready before hand
首先我們先到Google Cloud Platform開啟虛擬主機這項服務,點選左上角的漢堡選項並且選擇 Compute Engine。
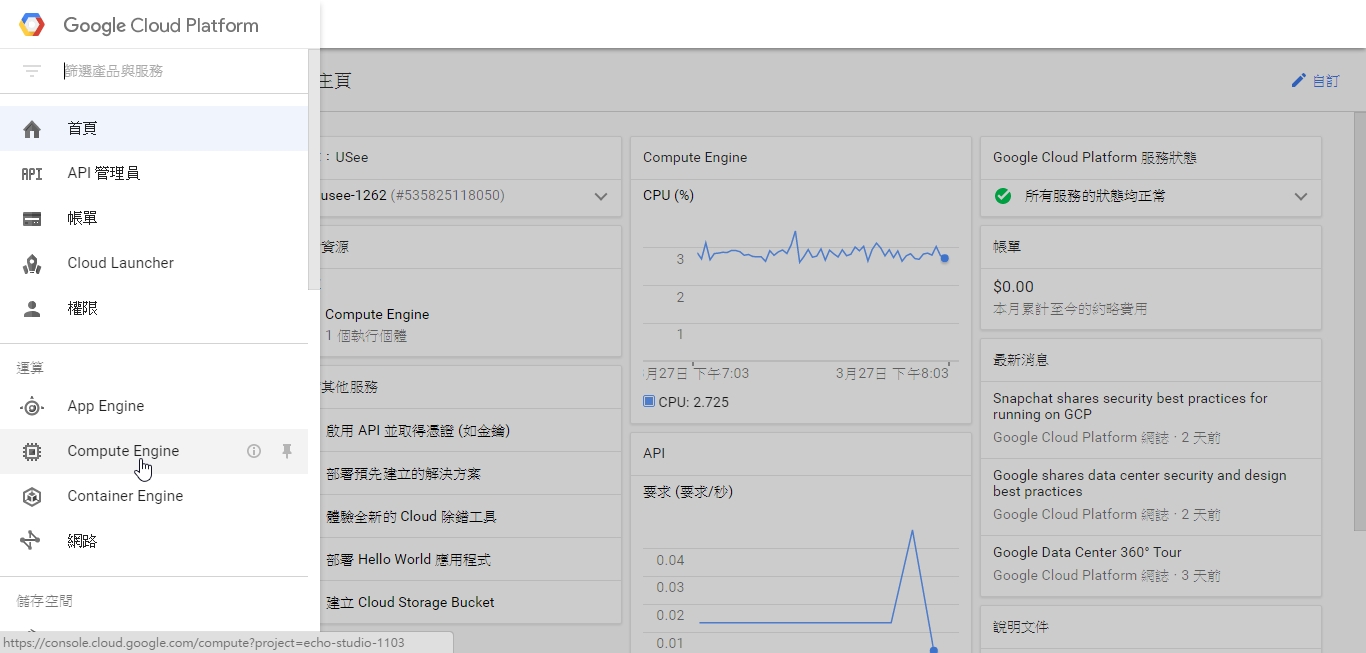
接下來我們針對 VM 建立一個虛擬主機,點選建立執行個體,之後輸入名稱還有區域,選擇你要的 CPU 與記憶體,接下來針對開機磁碟,我們點選變更,之後選擇 Ubuntu 14.04 並點選取,完成後點選建立等待一下就能把 Server 建立起來。

SSH Connect
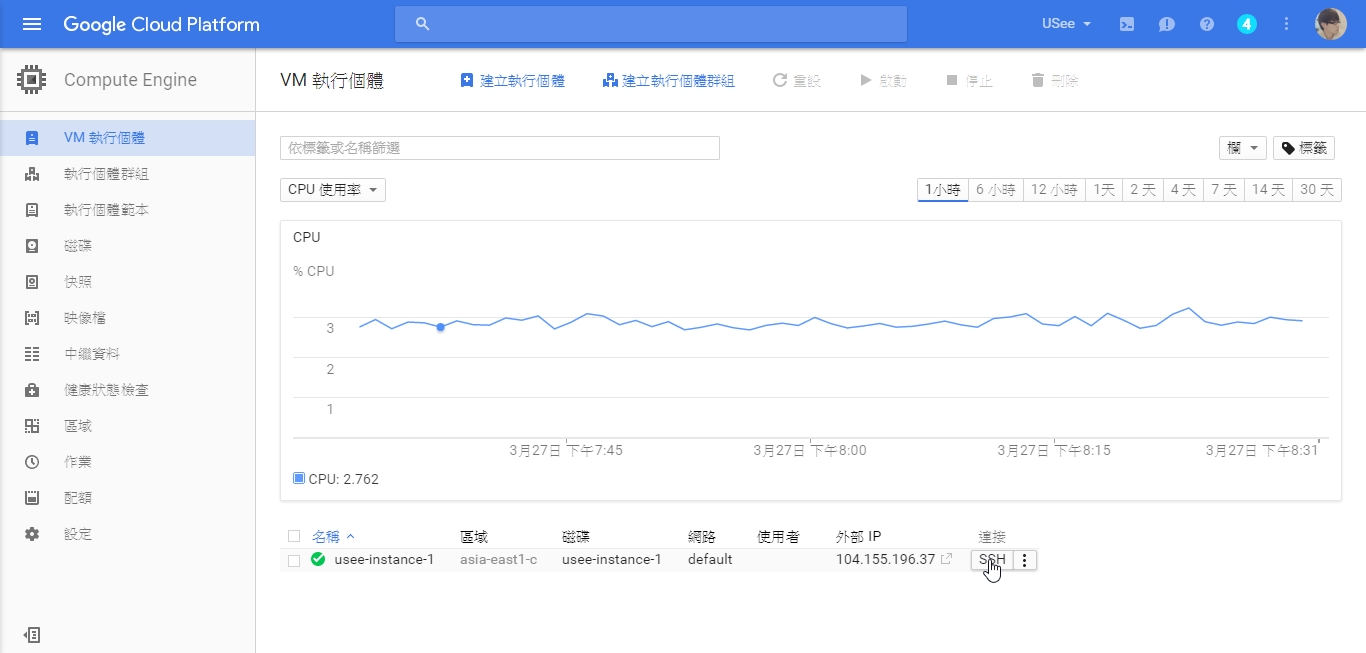
完成後您可以看到您的外部 IP,也就是從別處連結網址的地方,可以嘗試去你網域服務商,將你的網域轉到這個 IP 即可透過網址進入你的網站;接下來點選 SSH,我們進入 Command Line。
首先我們先更新apt-get(當跑出 Y/N,請輸入 Y):
1 | sudo apt-get update |
接著我們安裝 Git(當跑出 Y/N,請輸入 Y):
1 | sudo apt-get install git |
接下來我們可以開始安裝 Apache(當跑出 Y/N,請輸入 Y):
1 | sudo apt-get install apache2 |
再來我們要安裝 Lamp-Server,去驅動服務與 MySQL,但是 Lamp 無法透過apt-get去安裝,所以我們要先安裝其他的服務,再用那個服務去安裝 Lamp(當跑出 Y/N,請輸入 Y):
1 | sudo apt-get install tasksel(當跑出Y/N,請輸入Y) |
在安裝的途中會進入一個圖形介面,上面是輸入 MySQL Root 的密碼,輸入完就按Enter,這樣我們大致上把 Server 建立起來了,輸入網址就可以看到妳的網站了!

MySQL & phpMyAdmin
完成之後,總覺得少了什麼,因為 Lamp-Server 本身沒有 phpMyAdmin 所以必須自行安裝,接下來我們要安裝 phpMyAdmin 來設定與觀看 MySQL 的數據,我們在回到 SSH Command Line 進行以下安裝:
1 | sudo apt-get install phpmyadmin(當跑出Y/N,請輸入Y) |
安裝的途中也會跑出圖形介面,他會問此服務要依附在哪個服務器上面,點選空白鍵選擇 Apache2,在按確定繼續安裝,當他問你dbconfig-common時選擇 yes,接下來會開始輸入管理者的密碼,輸入完按確定繼續,共會有三次。
安裝過程實際增加 phpMyAdmin Apache 的設定檔,到/etc/apache2/conf-enabled,接下來要做的只是使用他,我們可以用指令:
1 | sudo php5enmod mcrypt |
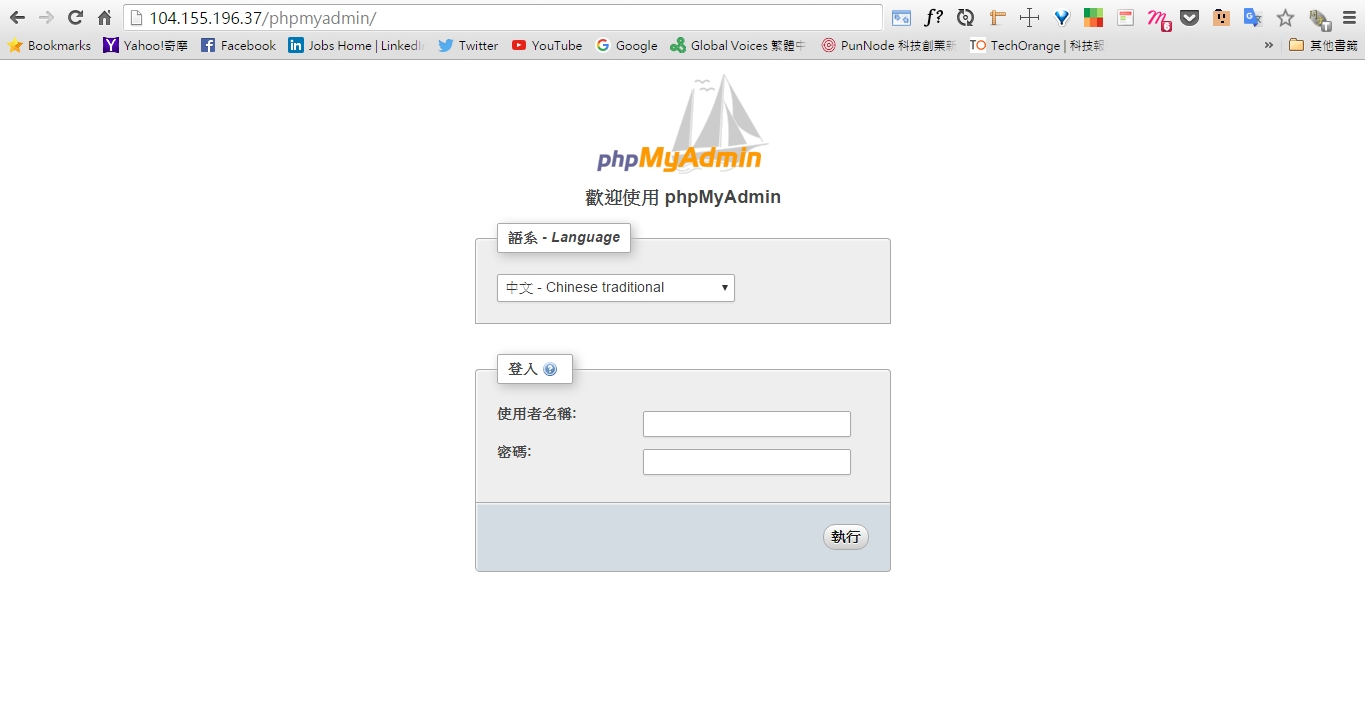
完成後不會有任何提示,接著我們重開 Apache2 就完成了,輸入網址http://[ip]/phpmyadmin,即可看到管理介面,帳號使用 root,密碼就是你剛才設定的密碼。
1 | sudo service apache2 restart |
Secure your phpMyAdmin Instance
接下來還是有一點問題,是不是每個人進來 phpMyAdmin 都可以狂 Try Root 的帳號,為了增加安全性,我們必須強化一些安全設置:
Configure Apache to Allow .htaccess Overrides
首先我們先到 apache2 內部設定 phpmyadmin:
1 | sudo nano /etc/apache2/conf-available/phpmyadmin.conf |
接下來在文件內找到<Directory /usr/share/phpmyadmin>在裡面加入AllowOverride All:
1 | <Directory /usr/share/phpmyadmin> |
輸入完成後點選Ctrl+X,結束編輯他會問你是否儲存,選擇y,在按確定即可儲存並關閉,接下來重啟 Server 就能完成初步的設定。
1 | sudo service apache2 restart |
※ nano 是一個編輯器,假設沒有此資料會自動幫您建立。
Create an .htaccess File
接下來我們增加.htaccess在資料夾內:
1 | sudo nano /usr/share/phpmyadmin/.htaccess |
接著我們新增以下資料:
1 | AuthType Basic |
功用解釋(懶懶翻譯,先放著 XD):
- AuthType Basic: This line specifies the authentication type that we are implementing. This type will implement password authentication using a password file.
- AuthName: This sets the message for the authentication dialog box. You should keep this generic so that unauthorized users won’t gain any information about what is being protected.
- AuthUserFile: This sets the location of the password file that will be used for authentication. This should be outside of the directories that are being served. We will create this file shortly.
- Require valid-user: This specifies that only authenticated users should be given access to this resource. This is what actually stops unauthorized users from entering.
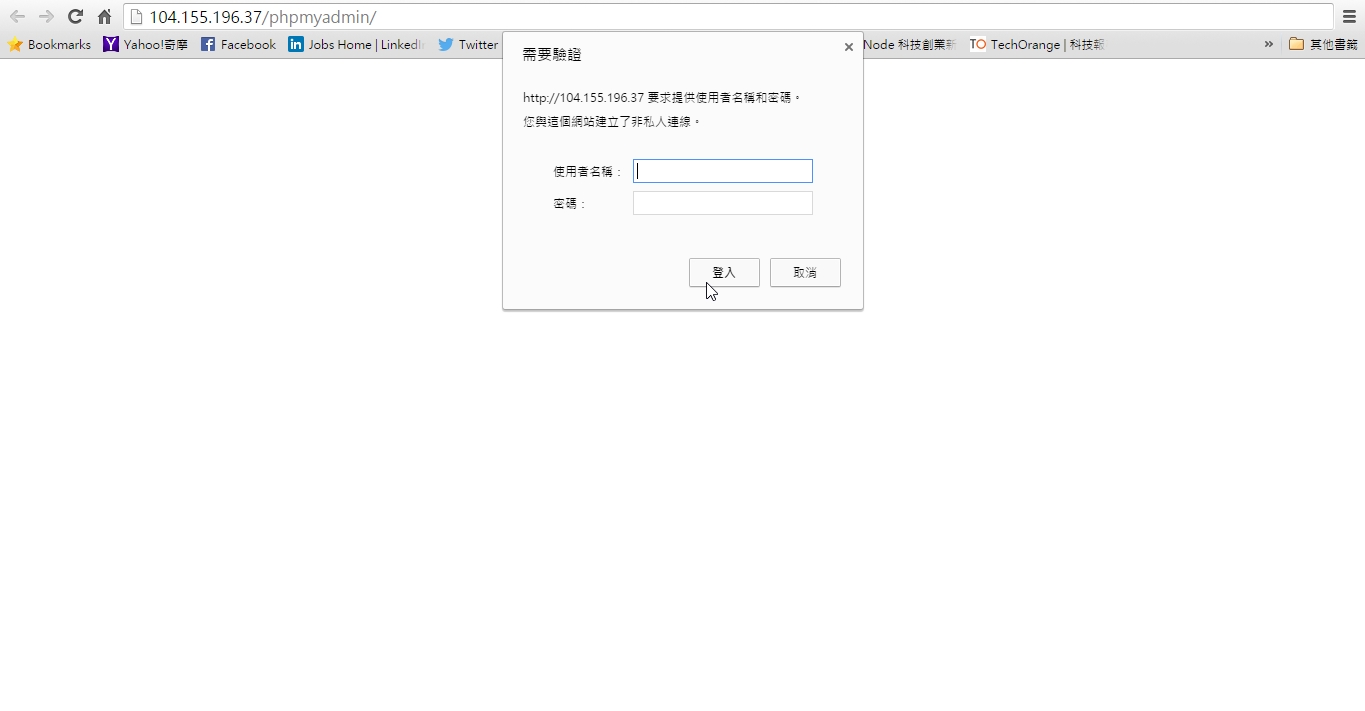
完成後並關閉,即可完成,上面大綱主要是作,當使用者進去 phpmyadmin 會先要求另一組帳密,藉此防止機器人亂嘗試密碼破解,雖然效果有限,但至少阻擋第一次驗證。

Create the .htpasswd file for Authentication
接下來我們安裝 Apache2 授權:
1 | sudo apt-get install apache2-utils |
接著我們可以建立進入權限的帳號密碼,username是輸入您想要的帳號:
1 | sudo htpasswd -c /etc/phpmyadmin/.htpasswd *username* |
另外如果想要再多新增幾個管理者可以透過,這次就可以把-c拿掉:
1 | sudo htpasswd /etc/phpmyadmin/.htpasswd *username* |
完成後他會接著叫你輸入密碼,完成後就可以登入摟!這樣我們就大功告成拉!


Watching your web file.
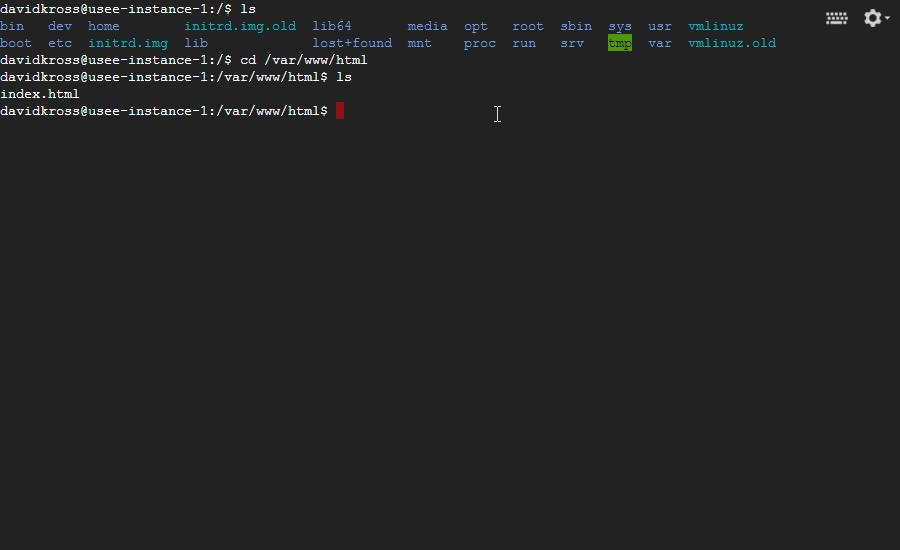
接著我們尋找網頁放置的位置,可以透過cd /var/www/html,網頁的內容都放在裡面即可。
About Mod Rewrite
在開啟用 CI 之前,我們想先做一件事情,打開 Apache2 的 Mod Rewrite,什麼是 Mod Rewrite,以下面例子來說,以往輸入網址可能後面會帶個變數,判斷目前是哪個商品或是哪個會員的資料等等,
改造前:http://www.xyz.com/profile?id=dkmonster
改造後:http://www.xyz.com/profile/dkmonster
我們可以透過 Mod Rewrite 來改變網址,讓網址變得更容易讀,然而 CI 又有提供 Router,那乾脆直接開啟 Mod Rewrite 比較方便去作設定。
接下來我們要打開 Apache 的Mod Rewrite設定(預設關閉),不然會有些問題,首先輸入指令啟動mod rewrite:
1 | sudo a2enmod rewrite |
因為在 Ubuntu 下,所有 Apache Mod 都會放在 mod-avaliable 之下,另外放在 mod-enable 則是已經被開啟的,然而輸入完指令,目前依然沒有任何效果,所以我們還要再到 Apache2 裡面設定:
1 | cd /etc/apache2/sites-available/ |
進入資料夾後用nano方式去打開:
1 | sudo nano 000-default.conf |
接著我們寫入以下資料,記住要新增在<VirtualHost *:80>底下:
1 | <Directory /var/www/html> |
儲存後,接著重啟 Apache2 服務即可完成。
1 | sudo service apache2 restart |
接下來就可以開心的玩 Web 摟~